When planning to build a golf simulator in your home or commercial space, one of the most important questions is: what’s the optimal enclosure size? This guide (based on the original article from Carl’s Place) walks you through the key factors to help you make the an informed choice.
Why Enclosure Size Matters
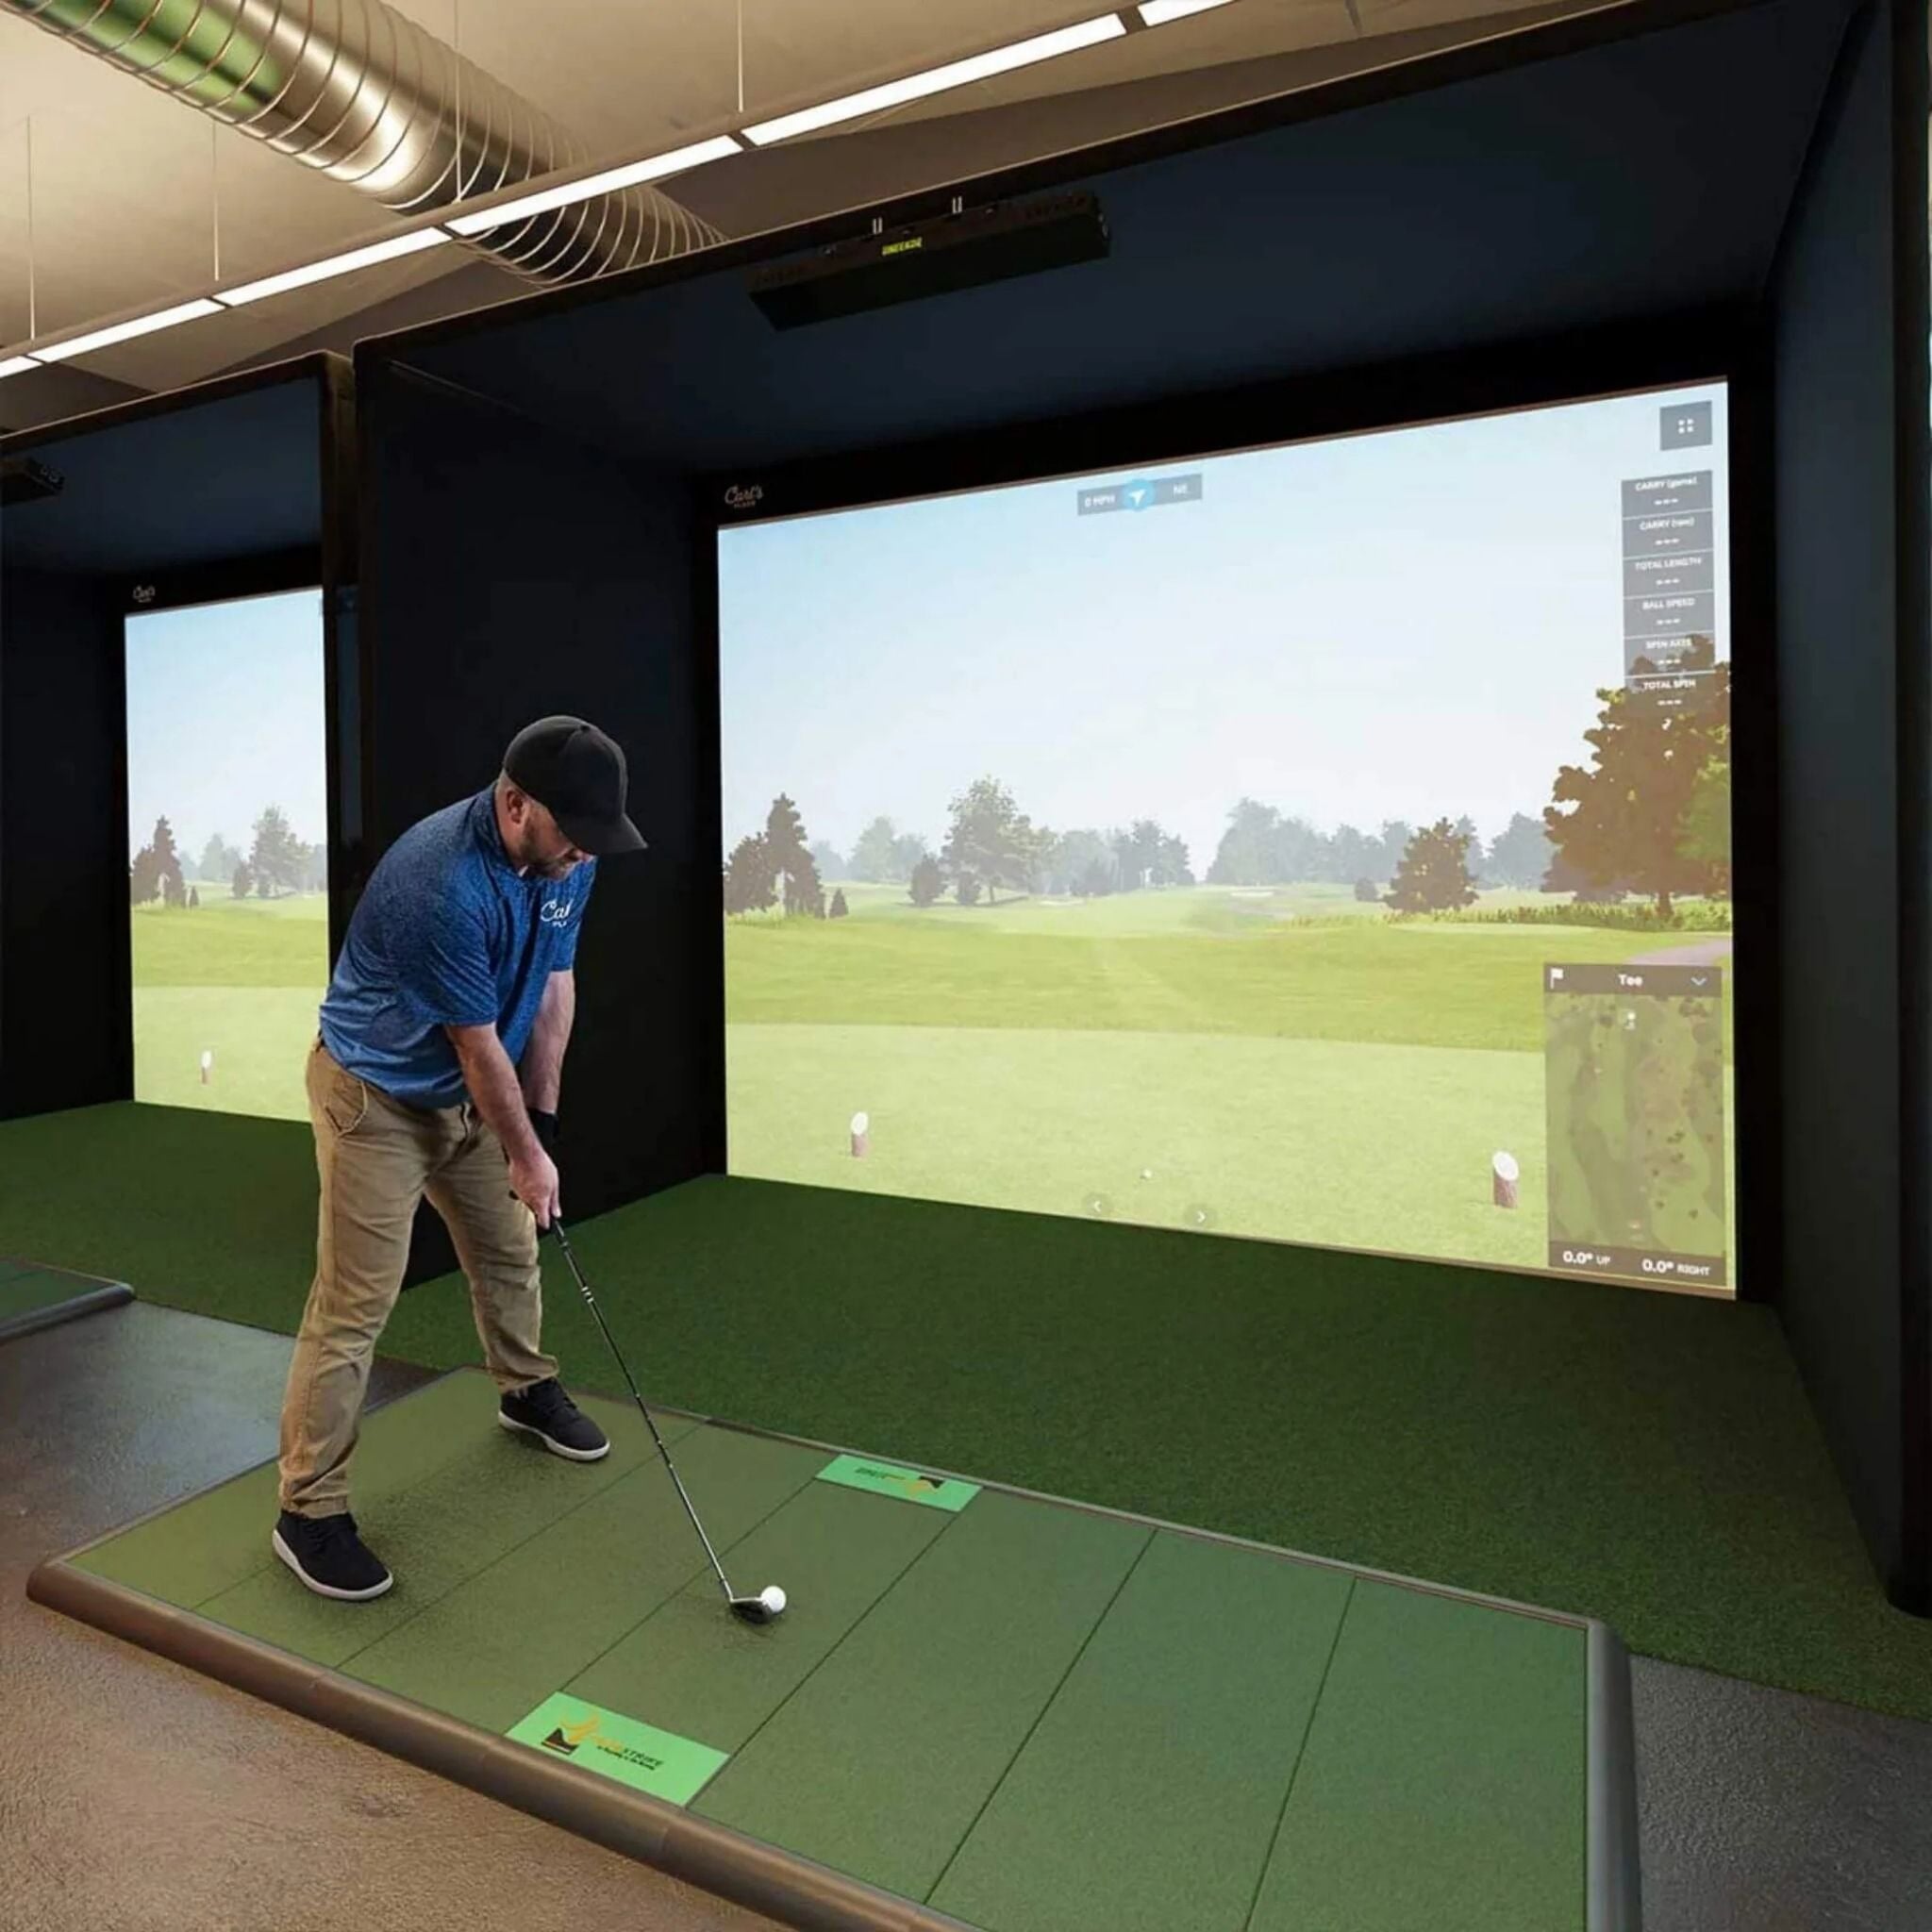
A golf simulator enclosure is more than just a frame — it keeps stray balls contained, blocks out ambient light, and helps you fully immerse in the experience. Choosing the right size ensures safety, comfort, and realism.
For many installations, Carl’s Place recommends a minimum of 14 ft width × 18 ft depth with a ceiling height of 9–10 ft.
Four Key Factors in Choosing Enclosure Size
Below are the top variables to consider, adapted from Carl’s Place insights:
1. Room Dimensions & Shape
Start by measuring your room carefully:
- Floor-to-ceiling height
- Width from left wall to right wall
- Depth (front to back) behind and in front of the hitting zone
Also consider obstacles (vents, pipes, beams, garage door tracks, windows, etc.).
A good tip: mark or tape out the enclosure footprint on your floor, and make some test swings (slow at first) to verify clearance.
![]() Carl’s Place cautions against going below 96 in (8 ft) in height or 100 in (8.33 ft) in width for a reliable setup.
Carl’s Place cautions against going below 96 in (8 ft) in height or 100 in (8.33 ft) in width for a reliable setup.
If your width is less than ideal, consider an off-offset arrangement — shifting hitting position slightly to one side — so backswing and follow-through have enough clearance.
2. Buffer / Clearance Space
You need extra buffer zones around the enclosure so it doesn’t touch walls, windows, or other fixtures.
- Height buffer: Leave at least 2–3 in, or ideally 6–7 in for easier installation, especially for premium or curved enclosures.
- Width buffer: Subtract 4–6 in total (2–3 in per side).
- Depth behind screen: Allow space behind the screen (for fittings, supports) — e.g. 8.25 in for DIY C-series, ~9.5 in for Pro C-series.

Also factor in your launch monitor’s required spacing behind or in front of the impact screen. Carl's Place
 3. Golfer Skill, Height & Shot Accuracy
Your enclosure depth should consider how accurate your shots are and how well you control trajectory:
- Advanced golfers may prefer deeper enclosures to avoid stray shots hitting walls or ceilings.
- Novices or inconsistent hitters benefit from greater depth (e.g. 10 ft or more) to fully contain mis-hits like shanks.
Be cautious with shallow enclosures (e.g. 5 ft) — they may not safely contain shots with high lofted clubs.
4. Aspect Ratio (Screen Shape vs. Room Shape)
The enclosure’s aspect ratio (width:height) determines how your projected image fills the screen without black bars. Carl’s Place outlines several options: 4:3, 16:9, 16:10, 1:1, or custom / non-standard ratios. Aspect Ratio
- 4:3 is often ideal for more vertical height without demanding width.
- 16:9 is common for HD and 4K, but requires a wide room (Carl’s Place suggests 14 ft width as a rough minimum).
- 16:10 fits a bit better in narrower rooms than 16:9 and matches some projectors’ native ratio.
- 1:1 (square) is useful in tight spaces but may show masking bars.
- Non-standard/custom shapes are possible but may result in image black edges or require projector adjustment.

 Matching your room’s dimensions to a workable aspect ratio is key, since changing one side (height or width) typically forces adjustments to keep the ratio.
Terminology You Should Know
Carl’s Place defines a few useful terms when talking about golf simulators and enclosures:
- Viewable Screen — The portion that can receive your projected image.
- Total Screen Size — Viewable area + screen borders.
- Enclosure Size — The outer dimensions including frame and fabric.
- Listing Size — A “friendly” nominal dimension used for marketing (may differ slightly from actual specs).
 Always review manufacturer spec sheets (especially the “Resources” section) rather than relying solely on listing names.
Final Takeaways & Recommendations
- Use your actual room measurements (height, width, depth) as a starting point.
- Always include buffer clearance for installation and safety.
- Let your shot dispersion and golfer skill inform how deep your enclosure should be.
- Choose an aspect ratio that balances your width vs. height constraints.
- Consult true spec sheets (not just nominal sizes) when selecting prototypes or kits.
With these best practices, you’ll have the confidence to pick the best golf simulator enclosure size for your space — maximizing safety, immersion, and performance.
Original article credit: Carl’s Place, “How to Choose the Best Golf Simulator Enclosure Size”

Share:
Indoor Golf & the Next Generation – Why Women & Gen Z Are Driving the Trend
The Man-Cave Reinvented: From Hideaway to Luxury Sanctuary